-
Singapore
Copyright © 2025 Powered by BCI Media Group Pty Ltd
Confirm Submission
Are you sure want to adding all Products to your Library?
Contact Detail


1. When the installation is carried out on a firm and waterproof support floor and with the appropriate drainage slopes, it is enough to arrange the joists structure on the support points (wedges, adjustable pedestals) and follow the installation and assembly instructions.
2. If the base is solid but water absorbing, it will be a must to install a plastic sheet to act as humidity barrier, with overlapping joints facing the drain slope.
3. If the supporting pavement is compacted, a 10/15 cm layer of quarry gravel must be extended, properly leveled, re-compacted and with the appropriate slope to drive the water to the chosen place. A plastic sheet should be placed as in point number 2. This system should not be installed directly on a compacted floor. (+ info. ask a professional). Installing a plastic mesh is also recommended to distribute the load correctly.
4. A 10/15 cm air chamber must be created between the support pavement and the WPC platform, allowing ventilation through the sides, in order to facilitate the ventilation of the lower part of the platform.
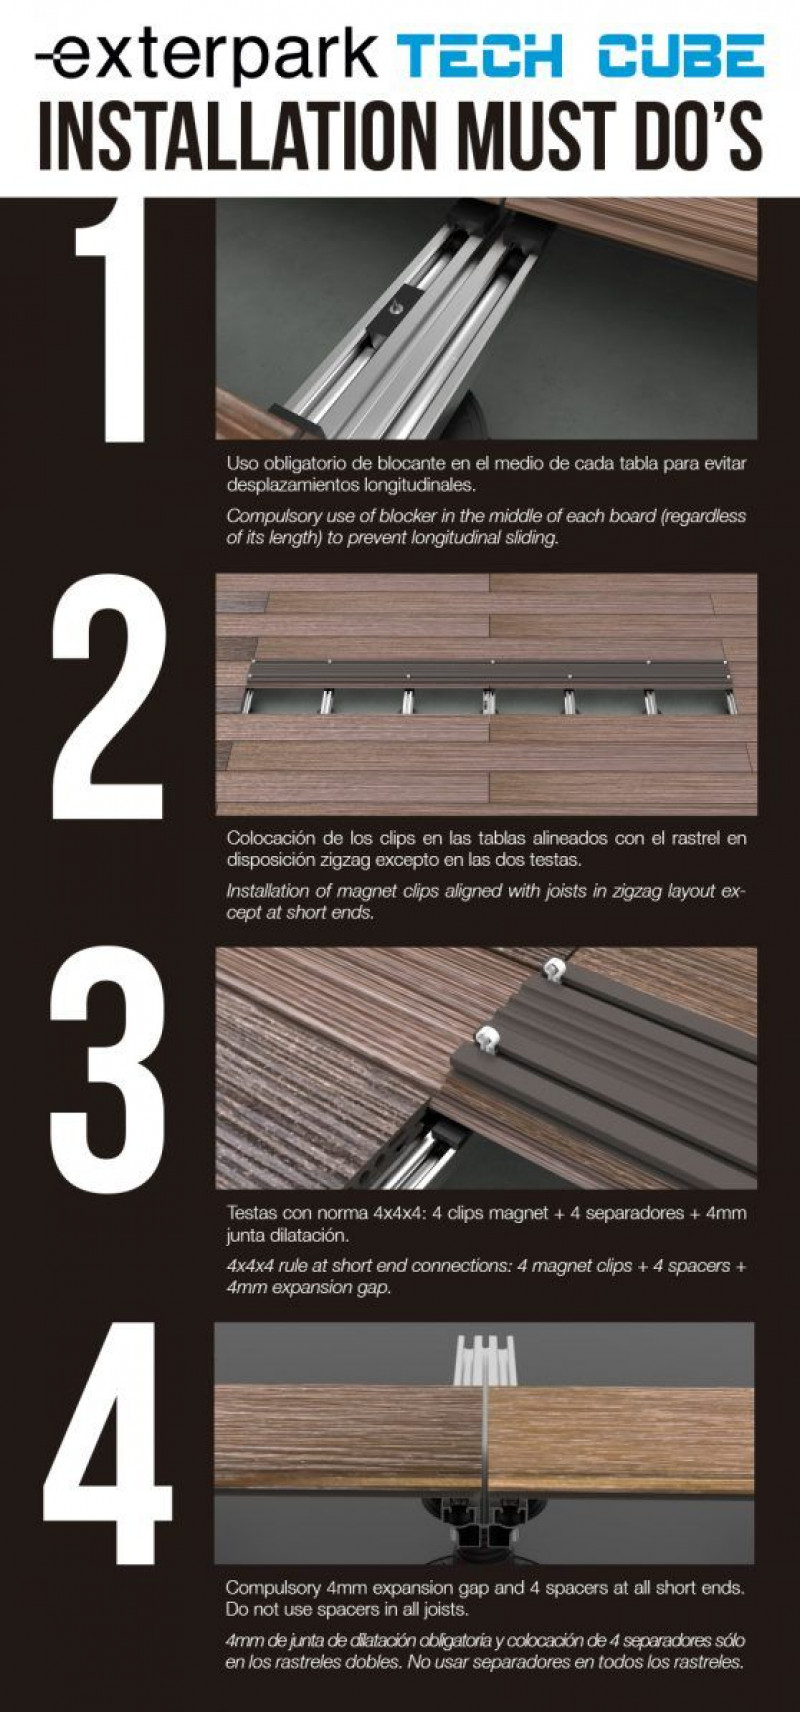
5. The installation of the pavement, as well as the aluminum joists, must be done by displacing the joints in consecutive rows.
6. Layout of the joists should be at 36.66cm for moderate uses, 31.42 for intensive uses.
7. To determine the dilation on sides of +/- 4mm, the local weather conditions of the site must be considered. Example: If, due to heat, the slats are dilated by 1 or 2 mm above their nominal size (2.20 ML), the joints must be left at 2mm or 0 millimeters so that they can go back to a 4mm safety joint at average temperatures. However, if the slat is contracted 1 or 2mm, the left joint must be of 6 or 8mm to obtain the 4mm safety joint at average temperatures.
8. These instructions also apply for metal or wood substructures.
Decking system suitable exclusively for pedestrian traffic.
Download our brochure with all details on the installation of Exterpark Tech Cube.


